

What you have here is not a simple task; laying in a concrete driveway will be the backbone of the attractiveness of your front yard, coupled with the initial perception that guests form upon it. Think of some hard and slick place that sustains years of tire treads, ice, sun, and rain, and does not crack or crumble. Sounds like magic? It is more or less a kind of science, an art and a step-by-step procedure that requires consideration to detail and regard to any phase. No matter how many international wars you want to fight on your own or hire the best, it doesn’t save you money, frustrations, and heartaches in the long run, knowing the secrets of a perfect concrete driveway.
The excavation at the site, up to the art of pouring and curing, will contribute to the success of your driveway. And according to your wishes not to be ignored, a few words too, about the heroes to whom few give the necessary prominence, to whom, which means them, you confide your investment upon silent nerve, your drainage design and the position of your joints. You are about to find out how to develop a concrete driveway that will have the audience standing on its feet. This manual will take you through the basics and do it in a fun and professional way that makes your driveway resistant and present it in a good polish that enhances over the decades.
Site Preparation and Foundation Work
What are the essential steps for pouring a concrete driveway, beginning with site excavation?
Proper site excavation is the necessary first action in laying a concrete driveway. This is achieved by cleansing the place of any pavement, plants, and rocks and clearing it by removing any debris on the surface to a stable surface. The depth of the excavation is normally 6 to 8 inches in relation to the quality of soil and the anticipated load. It should also be graded well so that it does not slope close to other structures, hence causing water damage in future or pooling. Excavated properly, this will form the foundation for a lasting driveway due to a steady and well-laid ground.

Why is proper sub-base compaction critical for preventing long-term cracking?
It is important that the sub-base be properly compacted to advance the fact that the ground on which the concrete rests is firm and evenly solidified. Without a good enough compaction, the bottom might not stabilize after settling, causing the stressing of the concrete slab and thus, random and uncontrolled cracks. Compressed sub-base spreads the load equally and prevents the movement of moisture, which otherwise causes the swelling or withdrawal of soil beneath the driveway. This is a basic step in avoiding cracking in the long-term whereby the concrete is strong and intact for several years.
Mastering Drainage and Joint Placement
The design of concrete driveway drainage involves an effective way of channeling the water which is diverted and cannot get into the driveway and the other buildings. Among the key points, one has to grade the surface with a shallow slope (about 1-2%), in place of the drainage channels or French drains, and the fact that the water does not pool or get saturated around the base of your house or garage. Proper drainage ensures that the driveway is defended against erosion, freeze-thaw and undermining, thus extending its and the surrounding landscaping.
What are the best practices for spacing control joints in a concrete driveway to minimize random cracking?
Control joints are cracks introduced into the concrete to tactic the manner in which the concrete may crack, as the concrete shrinks. The best practice is to space the control joints every 24 to 36 inches of the slab thickness (and so, a slab 4 inches thick would have the joints every 8 to 12 feet). The depth of joints recommended to be within 1/4 of the slab thickness is preferably initiated within the 6-18 hours of the pour as a way of controlling shrinkage cracking. The correct spacing of the joints and timing ensures straggled cracks, which keep the functionality intact as well as the appearance.
How does installing stress relief joints in concrete near structures (like the garage or roofing construction) prevent shifting?
Stress relief joints are installed around fixed structures, including garages or roofing construction pads the concrete slab from the hard building structures. Those joints allow movement due to expansion of the thermal effect, movement in the soil or settling of the structure and allow the concrete to move at the point of contact with the building to avoid cracking or shifting. These movements are separated out by stress relief joints to enable the driveway to bend a little bit against an isolated joint without causing any harm to the structure, at the points of contact.
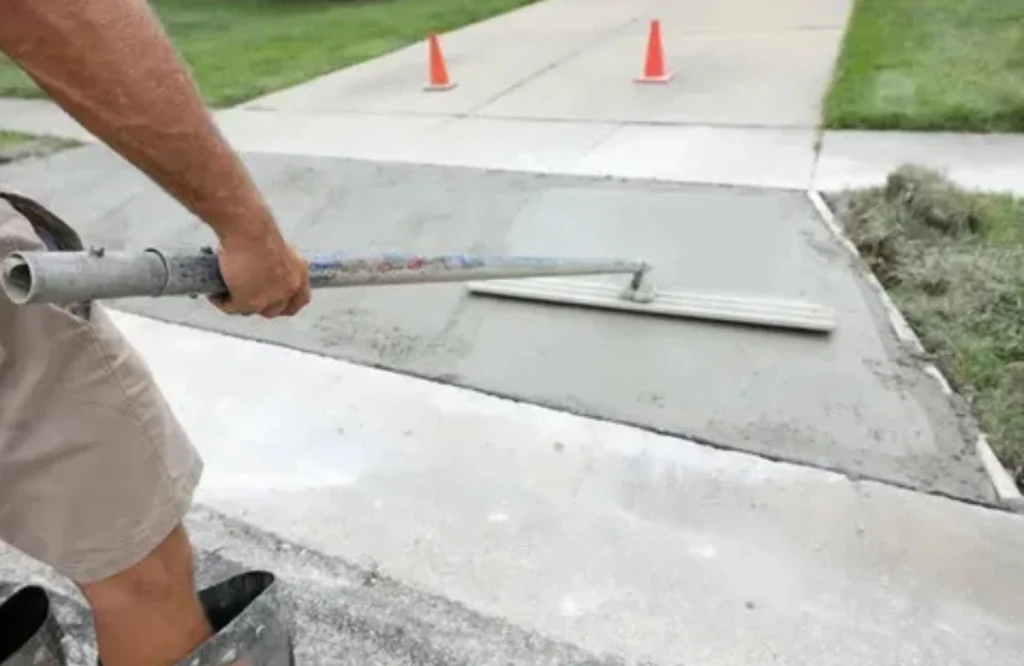
Pouring, Finishing, and Curing
Prevention of the occurrence of concrete driveway dusting entails the correct finishing and drying methods. Lightly broom finishing the surface once the initial pour is complete provides traction and does not weaken the surface. The use of curing compound, plastic wrapping or wet burlaps avoids quick loss of moisture that leads to surface dusting and scaling. It is best not to overwork the surface in the mixing process and maintain the water-to-cement ratio steady in order to minimize dusting, which is a result of weak surface mortar.
What are the differences in finish quality between broom, float, and stamped concrete surfaces?
- Broom finish is the most common finish that is applied by sliding a broom on the freshly made concrete, which creates a tough, non-slip finish that is suitable for driveways and walkways.
- Float finish is more polished and is also done by hand or the use of a power float to smooth and compact the surface, which then can be finished with a decorative finish or the exposed aggregate finish.
- Stamped concrete resembles the texture of a brick, stone or tile; molds are pressed into new concrete before it hardens, which results in a very attractive and personalized surface.
The finishes have varying functions, where the finish is applied to make the surface safe and provide
What are the critical steps for proper concrete curing to achieve maximum strength?
Curing is extremely important to enable concrete to attain the required strength. The most important include keeping the concrete wet throughout the 7 days of at least covering it with plastic sheets or wet curing blankets. Do not have a fast process of drying either, keep the driveway in the shade of the sun and air. Control of temperature is also required, the moderate temperature of curing improves hydration. When not cured well, cracks can be formed throughout shrinkage, so proper curing will enhance durability, whereby the concrete can get maximum compressive strength.
Cost Analysis and Material Selection
The cost of a DIY concrete driveway will be much less in the short run, only covering the cost of materials and rented equipment. Nonetheless, DIYers are prone to such difficulties as site preparation inadequacy, sub-base compaction, and mistakes in finishing that may later be associated with expensive repairs. Professional installation covers work, materials, understanding of the steps involved in establishing a concrete driveway, and results guaranteed by warranty, but may be twice or even thrice the cost of the materials. The professional strategy helps to guarantee the life span and reduce the risk of failure, which can save money during the driveway’s lifetime.
What is the typical pervious concrete driveway installation cost, and what are its benefits?
The cost of previous concrete driveway runway installation is usually 15-30% as compared to standard concrete, primarily because of the special mix design and installation. The advantages are that it has better stormwater management since the water can seep through the surface and this reduces the run-off and helps in groundwater recharge. Pervious concrete is also beneficial in lowering the amount of heat trapped on driveways and it has less environmental impact, thus it is the best solution in sustainable landscaping.
What are the factors that influence the final cost of both standard and specialized concrete mixes?
Several factors influence the final cost, including concrete mix design (strength, additives), site accessibility, labor complexity, sub-base preparation, forming and reinforcement requirements, and desired finish type. Specialized mixes like pervious or decorative stamped concrete raise costs due to added materials and labor time. Climate and local material availability also affect pricing. Properly budgeting for these elements ensures accurate cost estimation for any concrete driveway project.
Conclusion:
Once you master the measures to take to pour a concrete driveway, starting with site preparation and continuing to curing, you have invested in the job: You should prevent heavy traffic within 7 days, clean up softly, seal out against stains and weather, and caulk to seal up incidental cracks to prevent freeze-thaw damage. By designing concrete driveways to drain water properly, erosion, damage to roots, and flooding caused by water will be eliminated, which damages landscapes and retains the property value and the stability of slabs. Most importantly, an exact spacing of joints in the concrete driveway and the installation of stress relief joints in concrete near the buildings manage the shrinkage and expansion to prevent the appearance of random cracks for up to 30 years of durability. Combine all these habits, starting with preventing dusting of your concrete driveway and comparing DIY concrete driveway cost vs professional application and have built a concrete driveway that becomes a permanent home upgrade.
Ready to upgrade your driveway? Contact Maura Masons Corp today for expert concrete driveway installation and repair.
FAQ’s
Q: How long after installation is it safe to drive on a new concrete driveway?
A: After 7 days, light vehicles are allowed to drive on the new concrete driveway; after 28 days, the full strength is reached and one can carry heavy loads without any risk of damage.
Q: What is the ideal time of year for installing forms for a concrete driveway?
A: The conditions are the best in spring or during the fall when forms supporting a concrete driveway can be installed, since the weather is not very hot to cause the quick drying process or when it is not very cold to prevent the process of curing in winter.
Q: Does the higher previous concrete driveway installation cost justify its environmental benefits?
A: It is so because the cost of a higher (15-30% more than normal) previous concrete driveway installation rate or cost is well rewarded in terms of less runoff, less groundwater recharge and less flood risks, which makes it financially worthwhile to such environmentally friendly property owners.
Q: How soon after the pour should the contractor begin spacing control joints in the concrete driveway?
A: Excavation and tooling space control joints in concrete driveways are supposed to be cut or tool-tied within 6-18 hours after concrete has been poured so that the shrinkage cracks can be guided effectively before the concrete has fully hardened.
Q: How often should I seal my concrete driveway?
A: Seal it every 2-3 years to resist all the stains, moisture and wear and increase life lifetime- use it after cleaning.
Q: How long after installation is it safe to drive on a new concrete driveway?
A: It is generally safe to drive on a new concrete driveway after 7 days, but full cure and maximum strength take up to 28 days. Lighter vehicle traffic can begin earlier with caution.
Q: What is the ideal time of year for installing forms for a concrete driveway?
A: The best time to install forms and pour concrete is during mild, temperate weather in spring or fall to avoid extreme heat or freezing temperatures that interfere with curing.